Quick workflow
- Open workspace - open the folder you want to manage as a Rinne workspace.
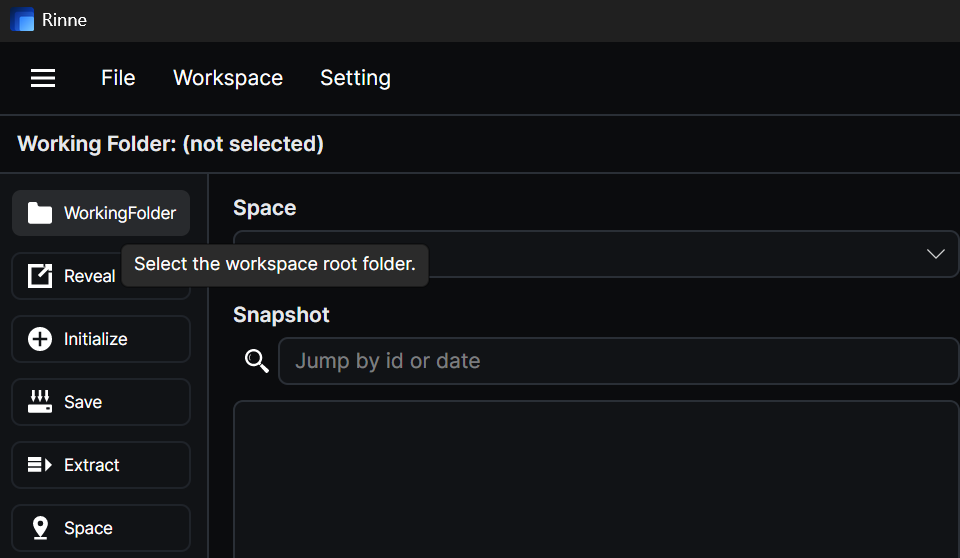
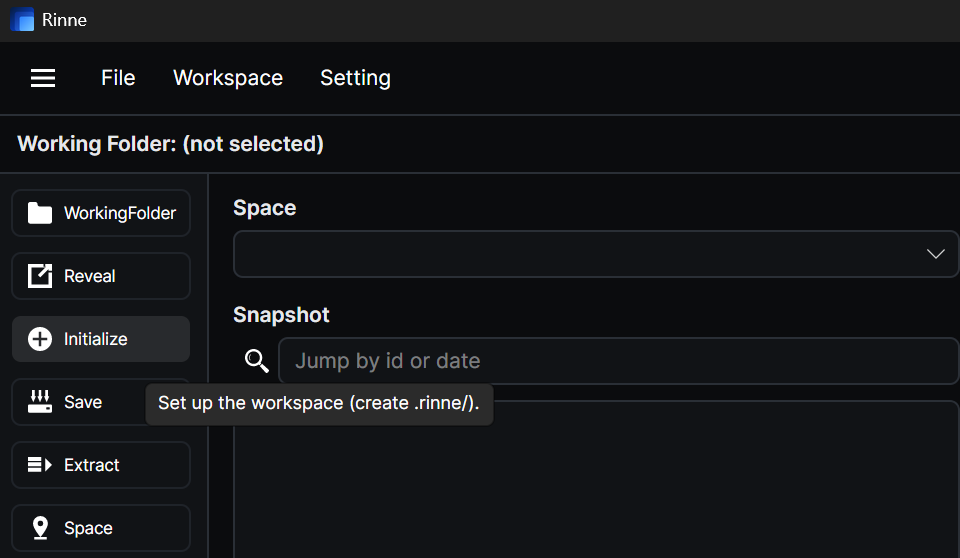
- Initialize (once) - initialize the workspace the first time. After that, you usually keep working in the same folder.
- Run actions as needed - the sidebar gives you the main operations: Save, Extract, Space, Verify, Diff, Fuse, Delete, and Restore.

Main window map
The exact layout may evolve, but the roles stay consistent. Before you run an action, confirm the basics in this order: Workspace -> Space -> Target snapshot -> Overview / Files / Notes.
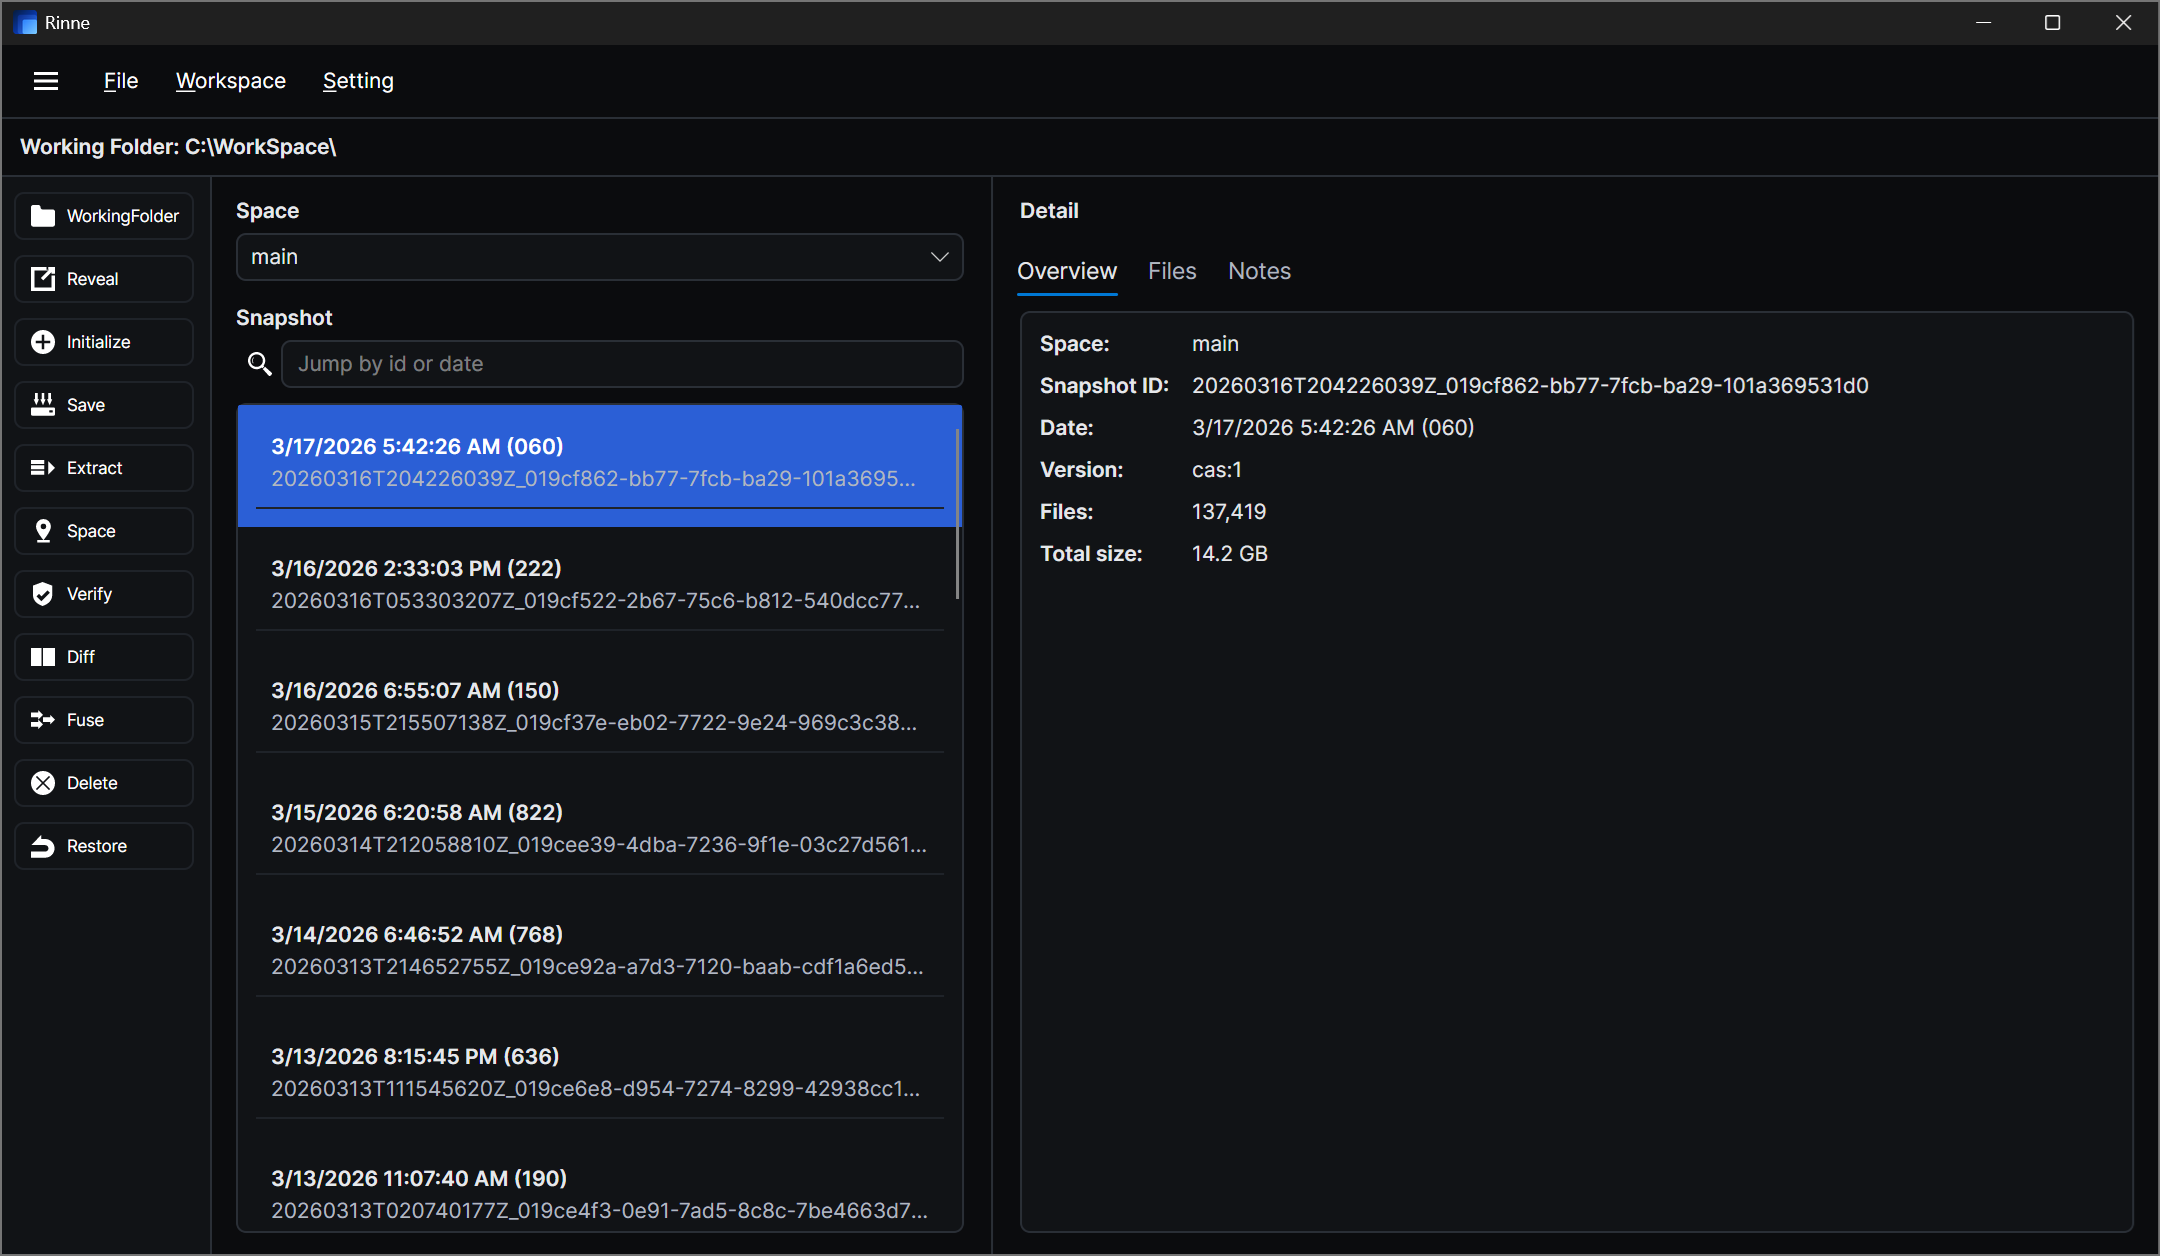
- Workspace: confirm the path at the top before you do anything. If it is wrong, stop here and open the correct folder.
- Space: select the active timeline. Save, history browsing, restore, and notes all follow the current space unless a window says otherwise.
- Sidebar actions: the left sidebar is where you operate the workspace: WorkingFolder, Reveal, Initialize, Save, Extract, Space, Verify, Diff, Fuse, Delete, and Restore.
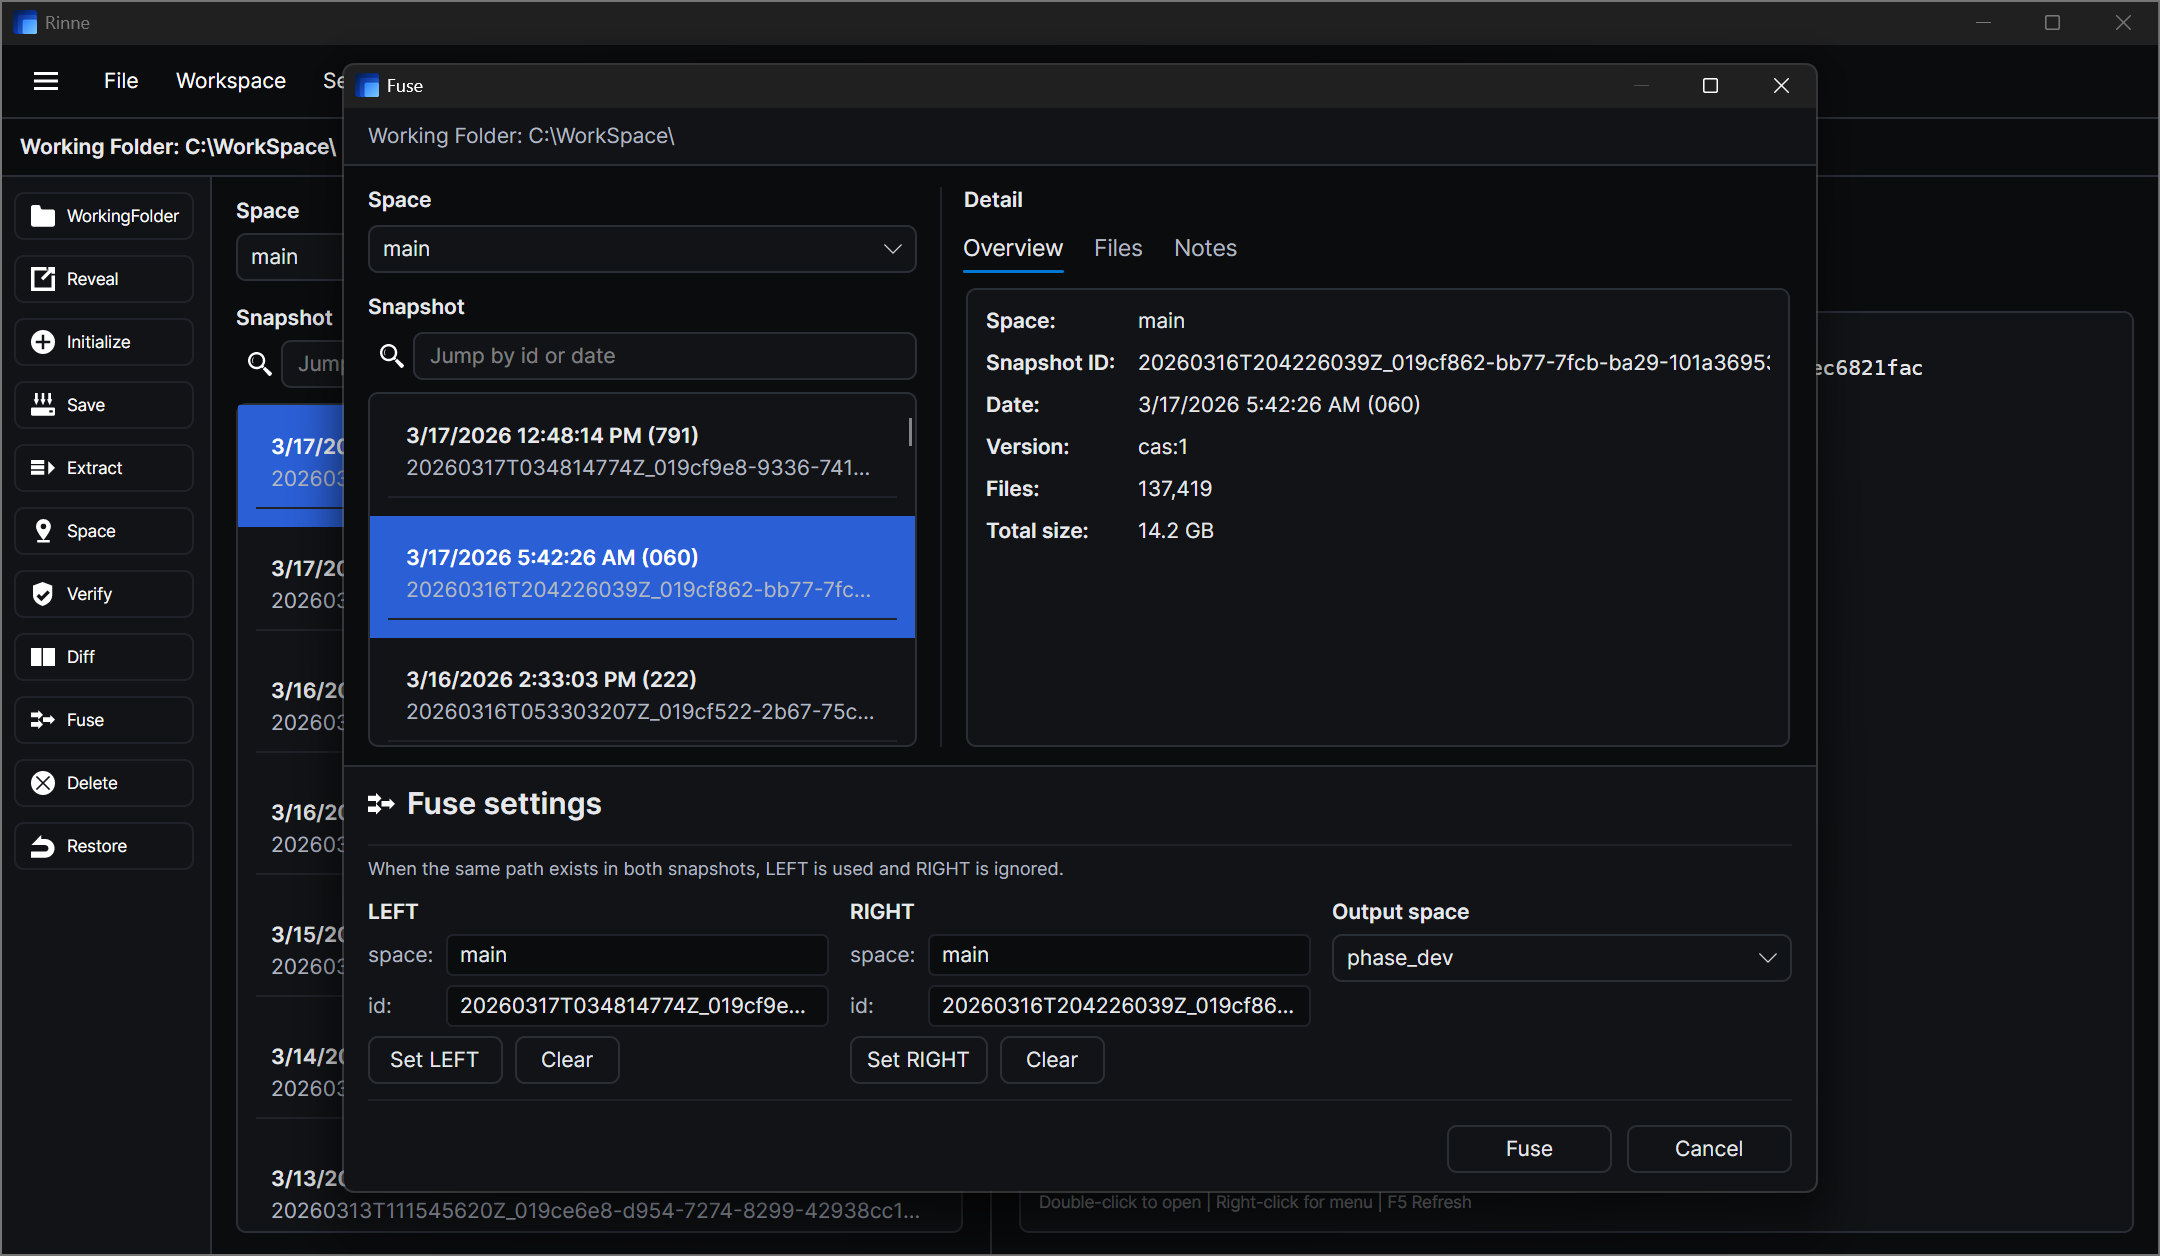
- Snapshots: this is your history list. Each entry can be inspected, diffed, fused, restored, deleted, or used as the base for Scoped Save from its context menu.
- Overview: the inspector for the selected snapshot. In the current UI this includes snapshot information such as Space, Snapshot ID, Date, Version, Files, and Total size.
- Files / Notes: use Files for path-level inspection and right-click actions, and use Notes to record intent for the selected snapshot.
- Progress / log: long-running operations report status and messages while running. Use it to confirm what is happening and to diagnose failures.
Files tab and context menu
The Files tab is where path-level work happens. Right-click a folder in the tree or an item in the file list to open the context menu. This is the main entry point for scoped operations and compare windows.
- Tree menu: Extract, Scoped Save, Validate, Restore, Diff, and Compare Export.
- List menu: Extract, Scoped Save, Validate, Restore, Diff, Compare Text, and Compare Export.
- Compare Text: file-only. Use it when you want an in-app line diff.
- Compare Export: file or folder. Use it when you want both sides written to disk for an external compare tool.
Diff window
Diff is the summary-level compare window. The left side is the selected snapshot. The right side can point to the current workspace or to another snapshot. Use it when you want a path-level summary before opening a text diff or restoring files.
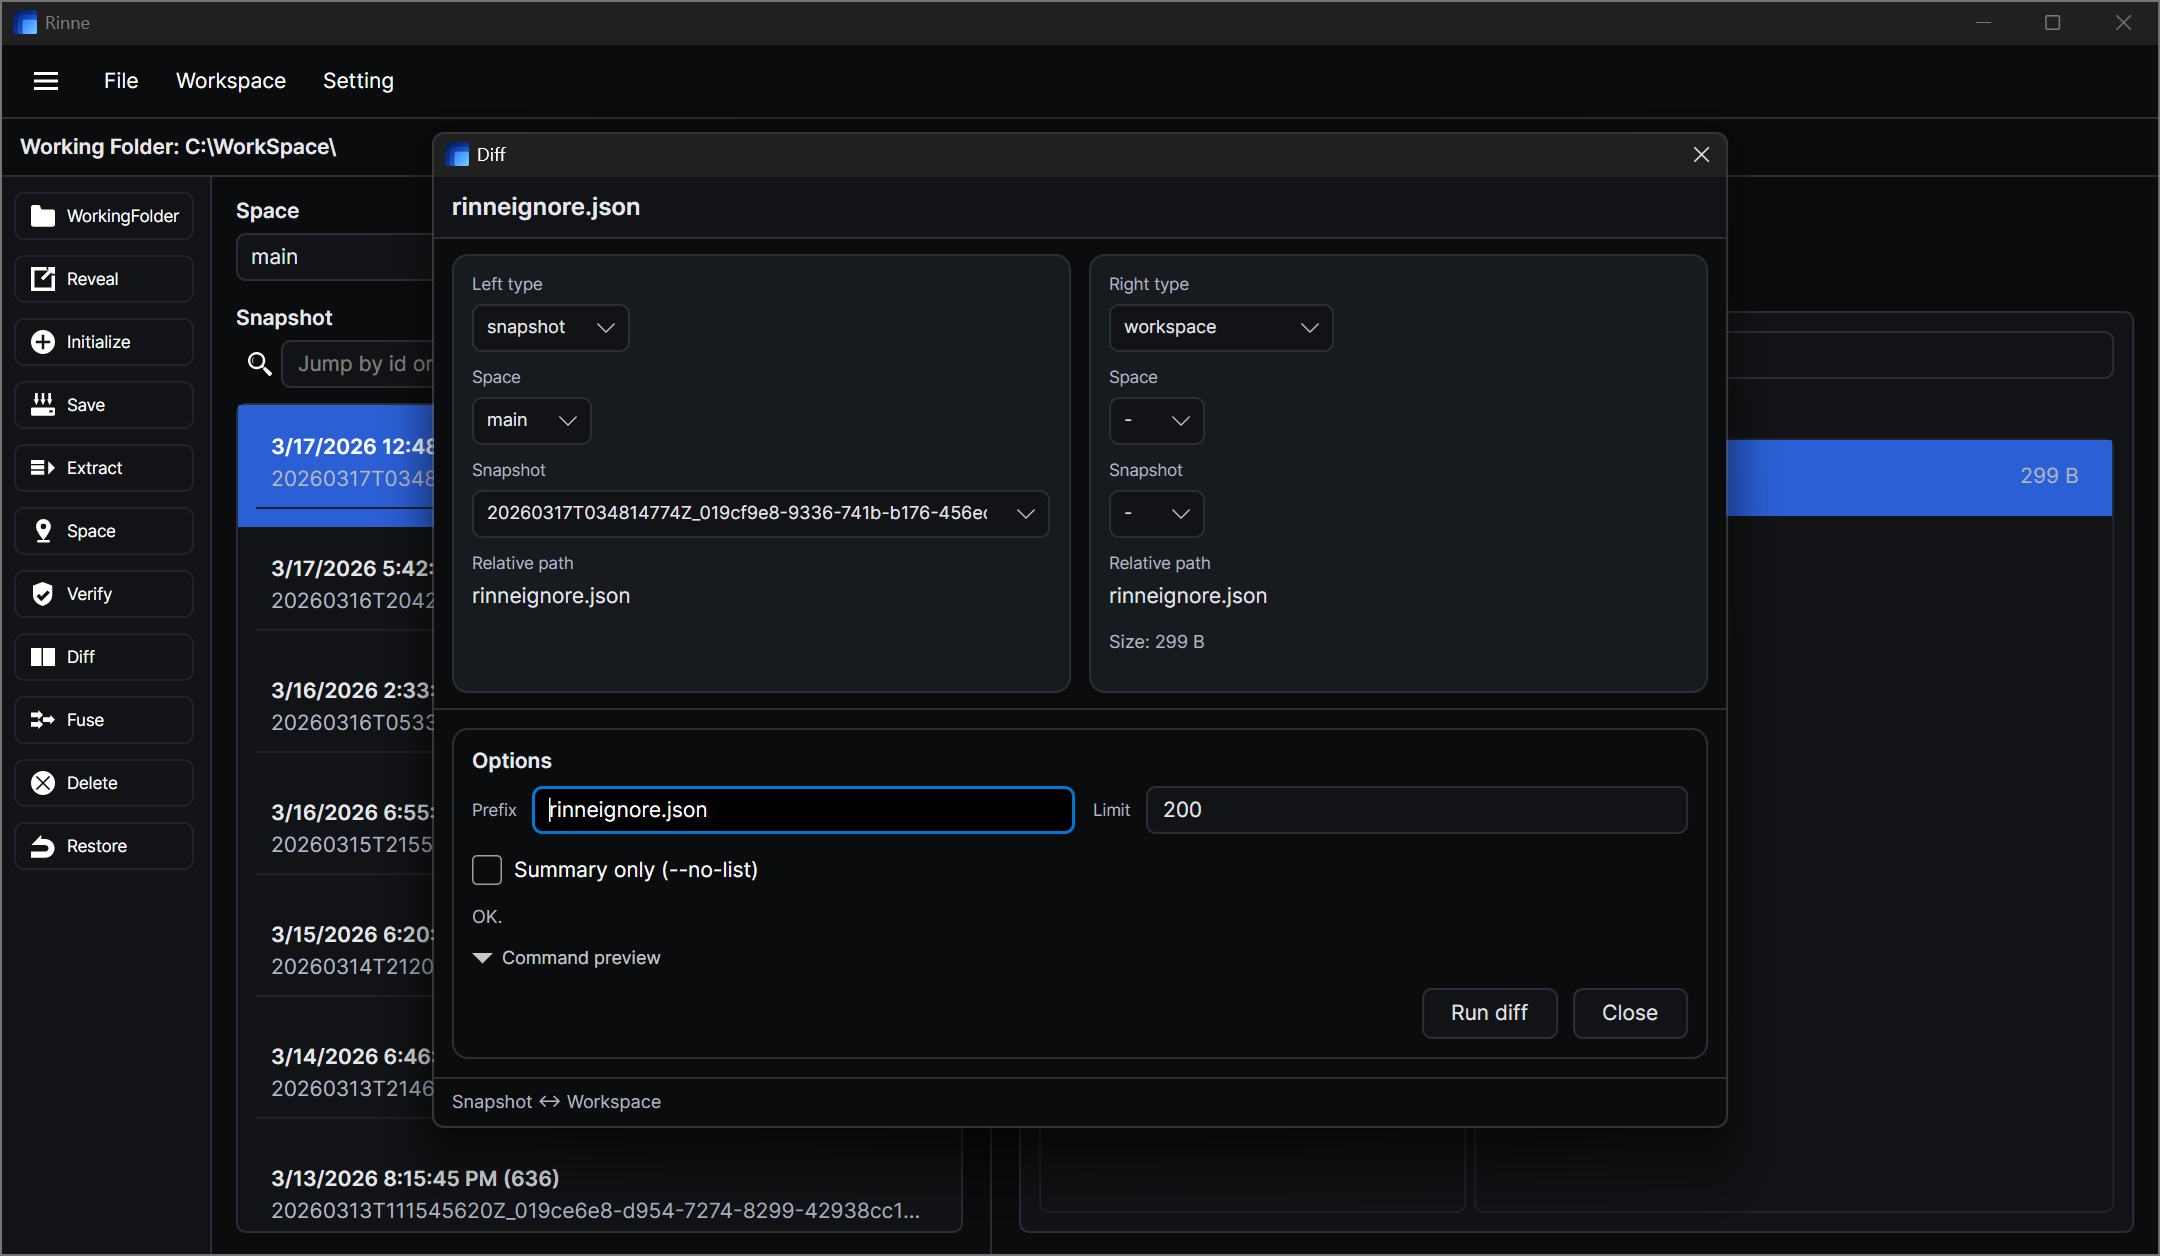
- Left / right target: snapshot on the left, workspace or another snapshot on the right.
- Prefix: narrow the compare to a subtree or file path.
- Limit: control how many diff entries are shown.
- JSON / Summary only: switch the CLI-style output mode without leaving the GUI.
- Command preview: check the generated diff command before running it.
- Footer mode: the footer shows whether you are running Snapshot ↔ Workspace or Snapshot ↔ Snapshot.
Compare Text window
Compare Text is the in-app line diff view. Open it from the file list when you want to inspect text changes directly. It is for files only, not folders.
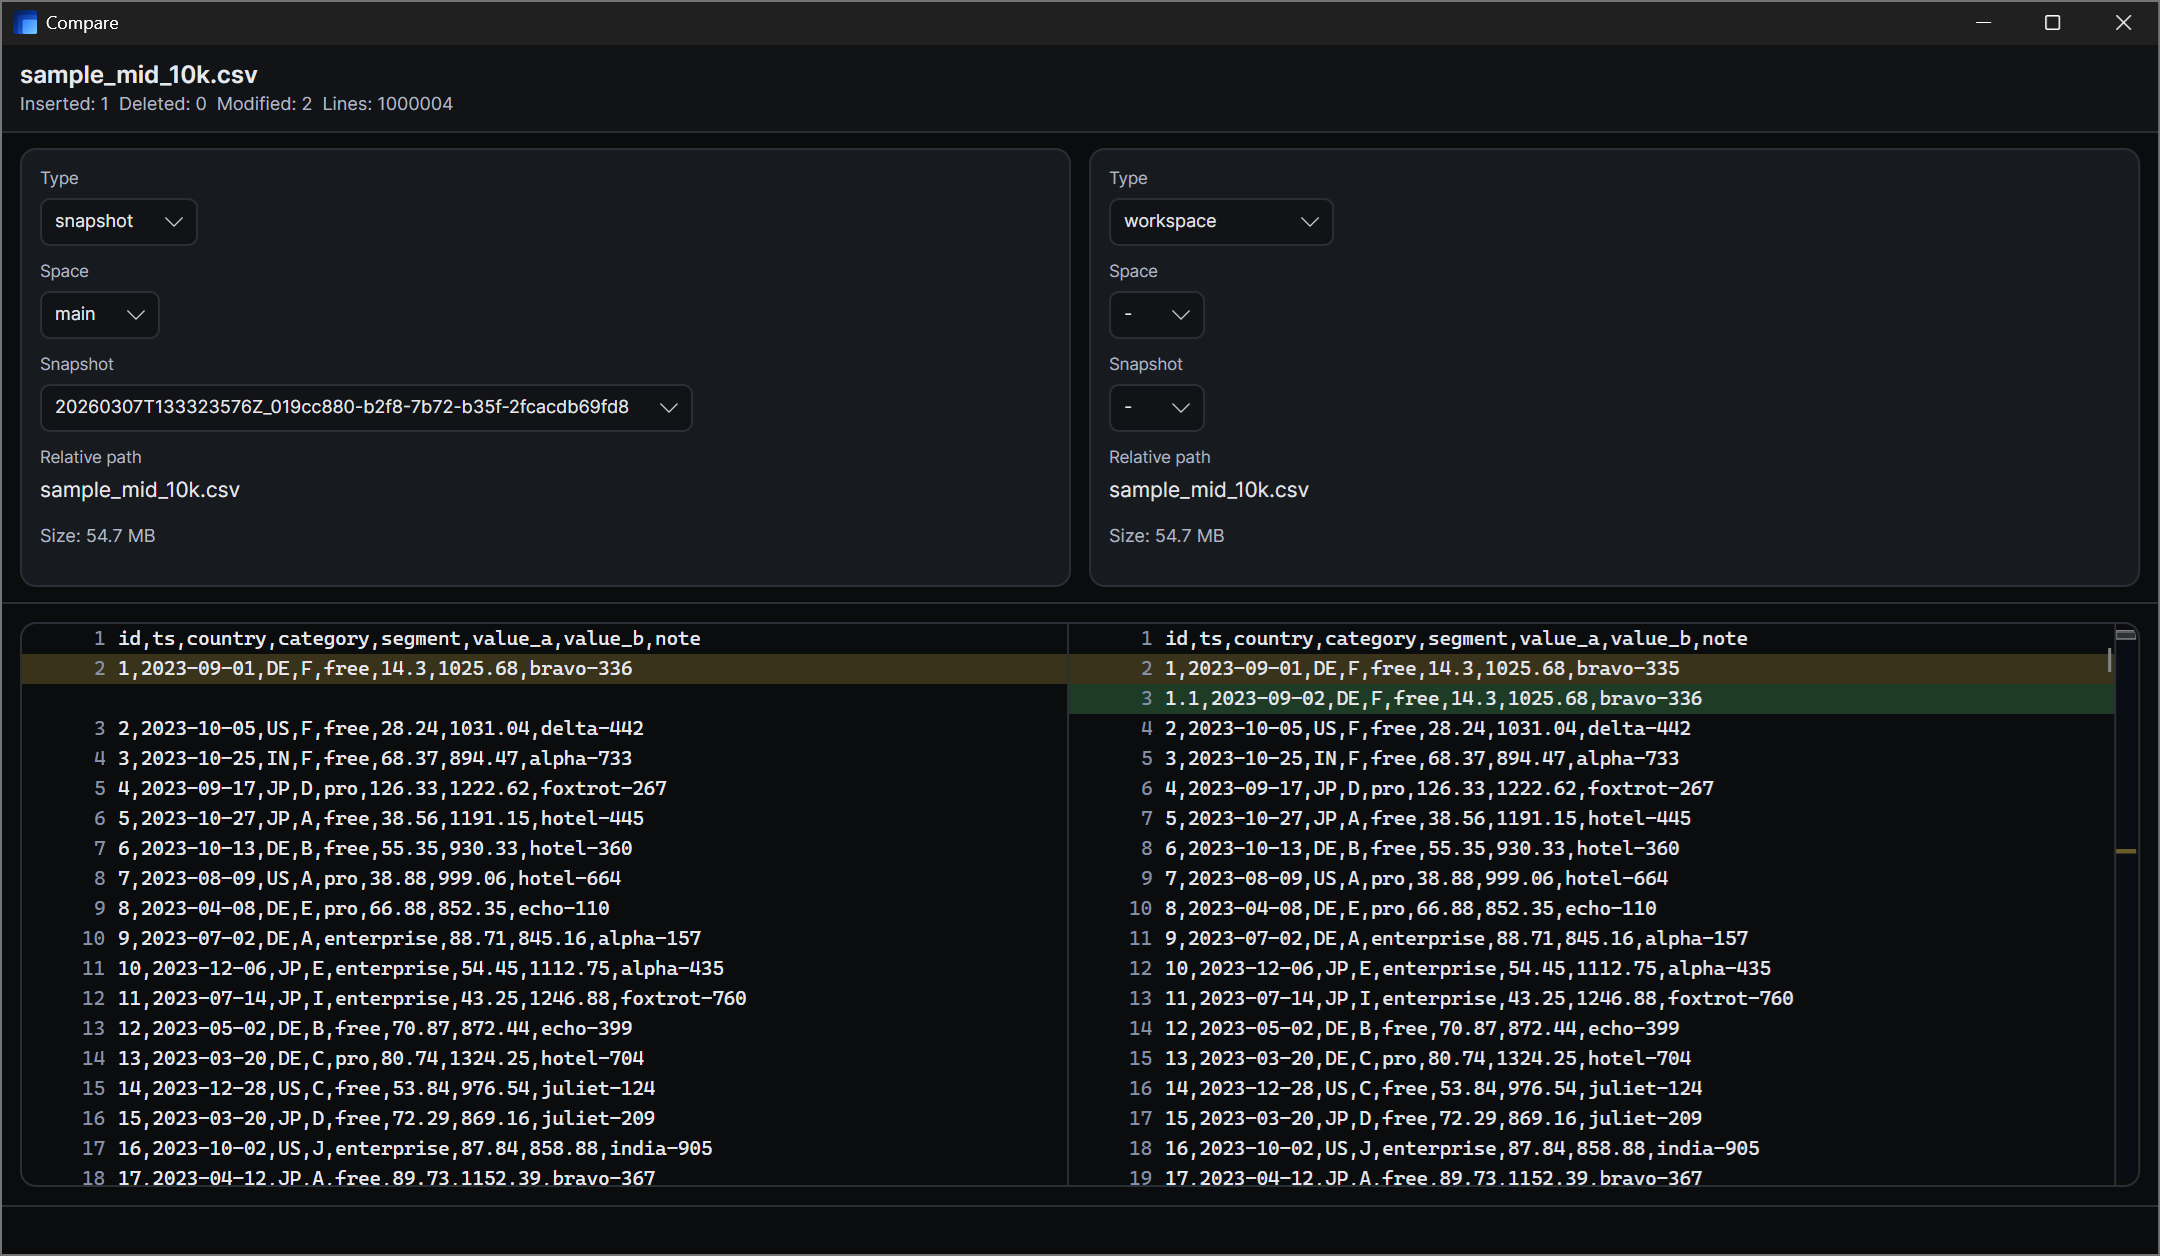
- Targets: snapshot on the left, workspace or another snapshot on the right.
- Header summary: the window shows Inserted, Deleted, Modified, and total Lines before you start reading the body.
- Overview bar: the narrow column on the far right gives you a fast map of where changes are concentrated.
- Limits: binary files are not supported here, and very large text files may be rejected by the in-app view.
- Long lines: when a line is too long to render safely, the window can show a warning banner and truncate the display.
Compare Export window
Compare Export writes both sides to disk so you can use an external compare tool. This is different from Diff and Compare Text: the goal here is not to inspect the result inside Rinne, but to prepare a clean export layout.

- Targets: snapshot on the left, workspace or another snapshot on the right.
- Destination folder: choose an empty folder outside the workspace.
- Export plan: expand it to confirm the output layout before exporting.
- Left / right layout: Rinne creates separate left and right folders so an external compare tool can read both sides cleanly.
- Use cases: useful for file compare, folder compare, or handing two exported trees to another tool.
Fuse window
Fuse combines two snapshots into a new snapshot, with the left side taking priority on conflicts. The source snapshots stay unchanged, and the result is written as a new snapshot in the target space.
Other windows
- Space: create, rename, delete, and switch between timelines.
- GC: maintenance for unreachable data and cache cleanup.
- Config Settings: configuration you rarely touch after initial setup.
Actions at a glance
Early Access note: the UI may change as the app evolves, but the workflow stays the same: confirm workspace and space, then run the action you intend.